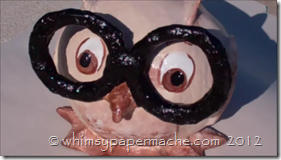
 This is a great project for summer camps or class rooms of people of all ages. You teach recycle skills and leave with cute little owls that will last a life time.
The process we use to create our owls' is the basic process to create a host of other whimsy animals such as penguins, pups, monkeys and more.
When you are ready to begin your Smart Owl here are the recipes to use: the paper mache strip recipe or the paper mache clay recipe, it is totally up to you.
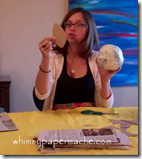
Here is a quick video for your convenience.
How to Start Your Paper Clay Owl
Step 1 Build Your Armature
 By crumpling up and stuffing newspaper in your bag you will create a nice roundish ball for the owl body.
I pick up corrugated boxes to cut up for limbs on my armatures, because boxes are usually thick. I cut out his feet from corrugated and secure the owl body and feet together.
At this point you can cover your armature with a 2 to 3 layers of paper mache strips to give you a solid surface to spread your clay on. You will let these strips dry completely before moving on to your next step.
Step 2 Apply Your Paper Mache Clay
Cover your owl armature with a 1/4 inch layer of homemade clay. Use your clay to shape your beck, wings, and tail. Work in stages to have a dry area for laying the armature down.
Let your clay dry completely before sanding.
Note: You can use the classic paper strip method throughout the project and your owl will turn out the same. For a rock solid sculpture you will need 15 to 20 layers of the paper strips.
Sand your armature before priming. Prime your owl armature with gesso and let this dry.
Gesso is an excellent, opaque primer for use on canvas or paper mache, and dries flat and flexible. I pick my gesso up from Blick or Walmart.
Step 4 Paint Your Owl
 I cover the entire owl with a tan acrylic base coat slowing adding brown to the wet tan (and a sprinkle of white) working it in. This will give your owl depth and he will appear more realistic.
I layered a mix of white and brown on just the wings for a feathering look. You can see this happen in the video.
I paint this all over the armature with special attention to the eyes, nose, wings and tail.
Step 4 Polycrylic Protective Finish Your Owl
Now that our owls are painted and dried we are ready to add a Polycrylic coat for protection and a satin shine. I usually let mine dry over night and send out in the morning.
Owl Material List
Now that you know you too can create this owl here is the list of supplies to collect. You may find other accessories to add to your owl, think outside the box.
Recycled newspaper & cardboard
Plastic bag
Tape
Paper Mache Clay
Acrylic paints, brushes
Varnish
And a Smile
Art Wrap Up
Great job everyone. I love this little guy and enjoyed watching him come to life in the studio. Just a note, you are not going to love every piece that you create and that's okay, I have found that usually there is someone out there that does. So your job is to keep creating and naturally you will improve.
If you like this and want more then make sure you click the like button or pin this to your Pintrest.com wall, It would help Me a great deal. Thank you in advance for your kindness and support.
© whimsypapermache.com


