 It is nice to see you at the studio, I know you will love painting on silky scarves at this workshop. Everyone is welcome especially beginners.
4 Easy Steps
You can take this little technique and create large or small scarves even make your own dress. You can save money when your purchase silk by the yard on sale and make a number of scarves from just a couple of yards. You can wait until you have recyclable silk from a blouse or dress; ideals like this are great ways to recycle clothing.
This easy trick will work on synthetic fabrics, do some experimenting, and let us know what you discover.
Paint a Silk Scarf
This video will show my daughter and me learning this cute technique shared to us by Michelle Newton at the Craft Social. Michelle is a lovely artist who gives back to her community hosting a monthly Craft Social; check out her amazing talent by visiting .
.
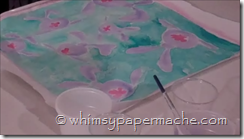 I have provided you with a list of materials, you will need to set aside at least 2 hours time for the first half of the project; the second half is rinsing and drying only.
Please watch the short video workshop for painting your silk scarf, most anyone can do this and I know you can. I would love to see your finished scarves, post them on our Facebook Studio Page.
Material List
Silk Scarf
Iron
Freezer Paper and scissors
Elmer's Washable Gel School Glue
Acrylic Paint, Water (H2O) and Brushes
Blow dryer
Start Scarf Creating
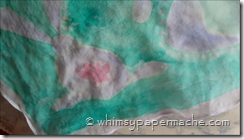 Begin by cutting a strip of freezer paper the length of your scarf. Lay your freezer paper with shinning side up on a flat surface and press your silk scarf to your freezer paper.
It is best to press the hot iron onto the scarf, instead of moving the iron around in an ironing motion.
Take the Blue gel glue and draw a design onto your scarf. The glue will prevent the scarf from absorbing the paint.
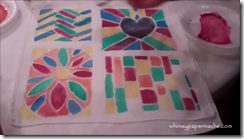 When drawing your lines press down with the bottle tip to create your lines. Keep the glue line constant is important, make use there are no gaps in your glue line.
You must let the glue dry, use hair dryers to speed up the process or just set them aside to dry. We all used hair dryers and blew the fuse at the church.
Now you are ready to paint your scarf by taking a small amount of paint and adding a lot of water to it. It was a lot like using water color but with borders. Let your paint completely dry.
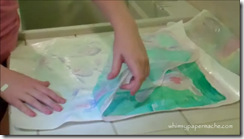 Use warm water to wash out the gel glue we used for our borders. After drying your scarf you're ready to wear your handmade high fashion scarf.
Awesome Job
I hope that you enjoyed painting your scarf with the studio today; I look forward to seeing you back again soon. Keep creating!
Pin Our Site to Your Pinterest Board, thanks in advance.
© whimsypapermache.com

