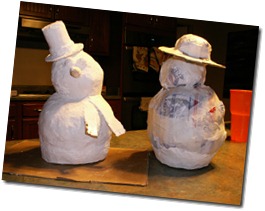
An Easy Paper Mache Clay Snowman
I made this little snowman by stuffing a plastic grocery bag with recycled newspapers and covering it with paper mache clay.
To start I want to give you the basic ideal of your snowman. First, stuff your bag with recycled newspapers, and then use string to create a neck. Use masking tape to cover the open top of the bag, and to cover any folds. Press and poke your bag until you get a shape and personality you like. If needed, add some more masking tape to hold the shape.
DIY Snowman Step by Step
2. Use ribbon to create a neck
3. Use masking tape to hold your shape
4. Attach hat & nose. Cover with clay and cover bottom with clay. Let this dry.
5. Paint a white primer coat.
6. Add your color. Let Dry. Paint him any whimsy way you fancy.
7. Coat your snowman with glaze.
If you like to use cardboard on the bottom of your snowman armature follow the steps below.
 Cut a round or oval piece from scrap cardboard and tape it to the bottom of your snowman so he has a flat surface to sit on. You will need to cover the bottom with duck tape; this will help keep the cardboard from warping while drying
Reinforced the connection between the cardboard bottom and the plastic bag, and give yourself a smooth transition, with more masking tape.
Next time I’ll use a cloth scarf, and maybe add a sweater…
Have fun with your Whimsy Paper Mache Clay Snowman. Come join us on facebook and share your whimsy art with us all, we would love to see and learn your technique.
© WhimsyPaperMache.com


