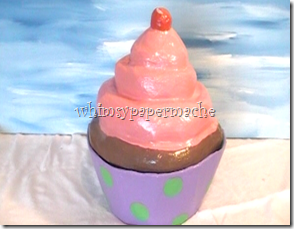
A Sweet DIY Paper Mache Giant Cupcake
 We have been baking up a giant paper mache cupcake tutorial to share this week. It is so sweet I know you'll find you have to make one too.
This cupcake is a giant cake designed to serve the family, which may be created with a few recyclables you probably have around the house.
You can decorate your giant cupcakes with icing and other cake decorations, such as candy, and cherries for a really whimsypapermache look.
Quick List
Cardboard box
Recycled Newspaper
Masking Tape
Paints and Paint Brushes
Glue Gun (optional)
H20 and Rags
Creating Your Cupcake Armature
1 Build Your Armature
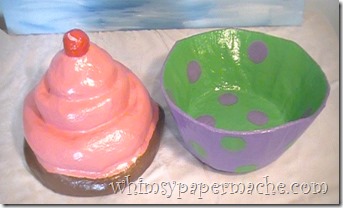
 The cupcake that we created is also a container, I will walk you through on video how I did this and here in can find a brief summary of that video.
CUP: Cut out the shape for the cup from recycled cardboard or use a bowl, etc. shaped like the cup to create your armature.
To create the cup cut a circle for the bottom of the cup and build the side from cardboard. This demonstrated in the short how to video.
You can secure all the pieces of the cup with tape or hot glue gun. Cover your armatures with a plastic bag; this will help prevent the cardboard from warping. When using thick cardboard sometimes I leave of the plastic bag.
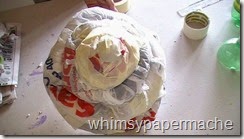
CAKE: Cut a circle that will fit below the rim of the cup. Account for building layers onto your armature, basically the top will be closer to the top once all your paper is applied.
Cover your armatures with a plastic bag; this will help prevent the cardboard from warping. When using thick cardboard sometimes I leave of the plastic bag.
2 Paper Mache Strips and Paste
 Cover the cup and the cake with 3 to 4 layers of paper mache strips dipped in your homemade paper mache paste. Will stripping make sure all your air bubbles are worked out to prevent air pockets from forming as the strips dry.
Your cupcake must be completely dried before adding more wet paper mache strips (see note) or using paper clay to finish your piece, which ever you wish to use.
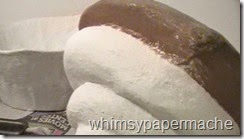
Once your 1 layer of news strips have dried Cover the entire clock with 1/4 inch layer of paper clay and let that completely dry before painting.
Note: If you are NOT going to cover with paper clay you can cover with more paper mache strips. Start by applying 3 to 4 layers of paper mache strips and let it completely dry before adding more strips. After these strips have dried continue using paper mache strips and paste to cover your cupcake with at least 10 more layers.
All 10 layers does not have to be done in one setting but once you stop for the day the giant cupcake must be allowed to completely dry before starting a new paper mache stripping session. Below you will find the recipes and steps.
Quick Link to Paper Mache Paste Recipe
If you need once the cupcake has dried you can lightly sand with sandpaper and wipe off.
3. Paint the Giant Cupcake
 Paint a white coat of paint on your clock to give you a white canvas for painting on. I used white interior latex paint as my base coat.
Once the base coat as dried paint with acrylics anyway you like. Paint a delicious cupcake. Let this completely dry.
You must seal your paper mache pieces with varnish for protection. Varnish comes in a spray can in gloss or stain, spray on 3 to 4 coats and let it dry.
A Delicious Way to Decorate Your Home
 This is just one way to make a giant paper cupcake; we would love to hear your thoughts and suggestions to improve this technique.
I cannot wait to see your beautiful cupcakes; these cute cupcakes remind me of a Katie Perry video or perhaps candy land.
Connect with us:
http://www.facebook.com/Whimsypapermache
http://twitter.com/whimsymachegirl
YOUTUBE
https://www.youtube.com/user/Whimsymachegirl
© WhimSyPaPermAche.com 2015