Paper Clay Unicorn Taxidermy
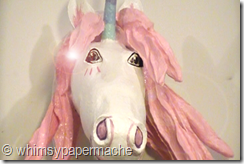 In this tutorial I teach you how to create your very own magical Paper Clay Unicorn with a beautiful flowing pink mane.
This paper clay unicorn is full of magic and sure to bring happiness mounted on your wall.
When creating your unicorn armatures think fantasy like Princess Elsa in Frozen.
Now you can watch as I build the unicorn armature from recycled card board and newspaper. Cover with simple paper mache strips and finish with homemade paper clay.
In sharing my process I hope to spark some creativity in you to create your own unique magical UNICORN.
What You Need
Recycled Newspaper
Masking Tape
Recycle Cardboard boxes
Paints and Paint Brushes
Plastic Bags
1# Paper Mache Paste Recipe
Homemade Paper Clay
H20 and Rags
Magic Happens at Whimsypapermache.com
1 Creating Your Unicorn Armature
Make your unicorn any size you like using the same concept described here.
Each armature pieces is listed with a brief description. You can make each piece and set it aside until you are ready to use it.
Ears: Cut each ear shape from recycled cardboard cereal box or such. Hot glue gun or tape your ears onto the unicorn head armature.
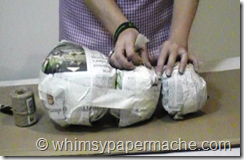
Head: Wad up newspaper into three different sized balls, tape the balls together, and wrap in a plastic bag. This will make up the Unicorn head.
Nostrils and Muzzle: I used homemade paper clay to build up this area. The nostrils roll to noodles and place onto the muzzle.
Neck: We will create the neck out of crumpled newspaper and stuffed into a plastic bag. You will tape your head to your neck and the desired angle.
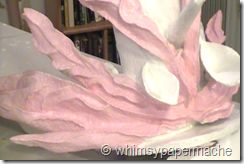
Mane: Roll up newspaper and wrap in a plastic bag, attach behind ears. You will connect most of the noodles with the strips and it will look like a flowing mane. Refer to video please.
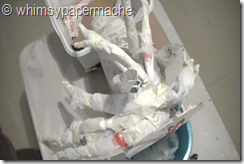 Horn: Make a horn by wrapping a sturdy piece of paper into a cone or rolling up newspaper and stuff into a plastic bag. I used a hot glue gun to secure it into place.
Attach all the armature pieces with tape and/or a hot glue gun and wrap in a plastic bag.
You are ready for step 2.
2 PaPer MaChe Your Unicorn Armature
Your entire armature in assembled and ready to cover with paper mache strips dipped in your homemade paper mache paste.
You will need to apply four layers of newspaper strips over the armature. After applying the strips you will set your armature aside and let it dry over night. (Could take longer depending your climate)
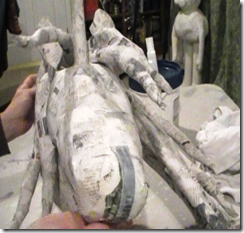 The Unicorn armature must be completely dried before adding more wet paper mache strips or paper clay.
Don't be afraid to work in stages as I did in the video.
After these strips have dried you will have 2 options. Option 1 is to continue using paper mache strips and paste to cover your armature.
Option 2 is to cover your armature with paper mache clay. Below you will find the recipes and steps.
Option 1
Now that the unicorn is dried add additional 10 or more layers to the entire unicorn armature. Concentrate on all the connecting sections of your armature, adding lots of layers.
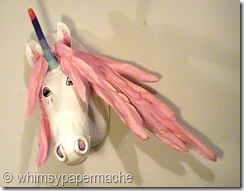 For Paper Strip Users: Paper towels are great for sculpting with paper mache paste and cover with a layer of paper mache strips. You can use towel pieces to create nostrils, mane waves and bone structure. It doesn’t have to be neat just create the basic structure after adding the first 3 layers and before apply the last layer. Covering with a layer of paper will make for a smooth finish.
FACT: However many layers you add to your armature, is how strong your Unicorn taxidermy will be.
Drying all those layers of newsprint strips will probably take more than 24 hours just depends on your weather outside.
Option 1 will take more time than option 2 of adding paper clay but the end result is fabulous.
Option 2
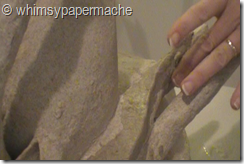 Use paper clay to cover your armature with about a 1/4 inch layer of clay but cover your mounting plague with at least 1/2 inch layer for a sturdy wall mount.
Smoothing Paper Clay; Mix a small batch of flour and water to use with your hands to smooth the paper clay onto your armature.
Build High Mane Motion
Using the clay to build up high ridges onto the mane for a flowing mane effect, love it.
The paper clay is a time saver, very enjoyable to work with and allows more freedom in sculpting.
3. Paint Your Paper Mache Unicorn
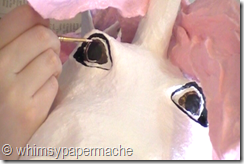 You simply want a white GESSO primer coat on your Unicorn; this coat of paint will fill in some of the rough edges and dips your sculpture may have. You can lightly sand your unicorn also.
Once the Gesso primer coats have dried apply 2 layers of white acrylic paint for a nice clean palette.
Paint your Unicorn with acrylics anyway you like letting your creativity go wild. Madison choose a beautiful ombre pink mane.
Ombre the Mane
Once the painting is complete you will apply a sealant coat of varnish.
You must seal your paper clay or paper mache pieces with varnish. You can spray or brush this on your Unicorn.
Just one more way to make unicorn taxidermy; I hope you have been inspired to create your own Paper Clay Unicorn.
What A Magical Unicorn
We would love to hear from you at the studio so please leave your suggestions and comments below.
Hi! I'm so glad to connect with you. I'd love to connect with you on Facebook and Twitter, as well.
© WhimSyPaPermAche.com 2015
