Make Your Own Little Minions
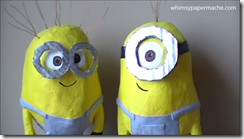 I thought the studio needed a few little minions running around just to help make art. I hope that can use this video to your advantage and create a few to help you around the house.
"Universal Pictures and Illumination Entertainment's worldwide blockbuster Despicable Me entertained audiences around the globe in 2010, grossing more than $540 million and becoming the 10th-biggest animated motion picture in U.S. history. This summer 2013, more Minion madness in Despicable Me 2."
Paper Mache Minion How 2
Make your minion any size you like, ours are around 12" tall with their copper hair. I used recyclable to make the armature which make this pretty inexpensive.
Here is a link to our recipe playlist to help you along: https://www.youtube.com/playlist?list=PLB8D3ABFF7E1554D3
Stuff a plastic bag full of newspaper for the minion body. Roll up one sheet of newspaper for the arms and legs. The legs are half the length of the arms.
Attach the arms and legs to the body with tape, glue, or whatever.
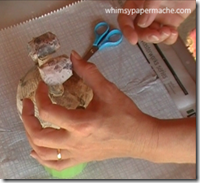
To create the hands soak newspaper in paper mache and wade up into a mitten shape and place onto arm.
To create feet cut a small oval shape out of cardboard and wade up newspaper for the top. Place this onto your armature leg.
2. Paper Mache Your Armature.
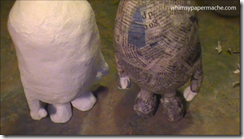
Apply 3 to 4 layers of paper mache to your armature and let this completely dry. This will take a full night of dry time, especially in the winter months.
You have a choice of finishing your sculpture with paper mache clay or paper mache strips. The clay will save you hours worth of stripping but either will work perfectly.
To finish with clay add 1/4 inch layer of paper mache clay all over your armature. Allow this to completely dry before moving on.
To finish with paper mache strips you will add another 10 layers to your armature to create a solid sculpture that is not easily broken. Let this completely dry before painting.
4. Lightly Sand and Prime Your Minion
You can sand paper mache or the clay to knock off the rough edges. Then you can prime your minion by giving it a coat of gesso or acrylic white paint.
This will help the newspaper print from not bleeding through your paint. You can leave this step off if you like.
 5. Paint your Minion with some color
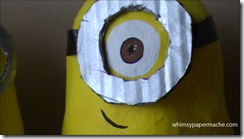
Use acrylic paint from the craft store to give him a nice yellow color. Then add your black where it is needed.
Paint their eyes on and let all your paint dry.
6. Make your goggles
Use a cup or something round as a guide to make circles onto cardboard for your goggles. Spray paint or paint them silver. Glue a ribbon or paint a ribbon onto your goggles for attaching onto your minion.
You can glue your goggles onto your minion or attach with a ribbon so you can take them on and off if needed.
 7. So now you can paint on your overalls or use scrap fabric to create them. I used the fabric in the video and with some patience I finally got them on.
I applied the front of the fabric overalls and over lapped them with the back. You can add a pocket for extra. I used glue to decoupage the fabric onto the minion.
Your Finished Minion
Awesome! Now you have your own little minion to submit to your every whim. Lol
You will need a couple of days to create your minions mostly because of the dry time between the paper mache and the painting. Adding fabric and glue will add to your investment but I like the effect the fabric gives.
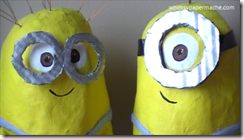 This has encouraged me to mix more mediums together to produce my art, definitely this has been a learning experience for me.
I do hope that sharing my process has been a help and inspiration to you. I am so glad you stopped by the studio today and I hope to see you again really soon.
Until then Keep Creating and have an awesome day.
© whimsypapermache.com
