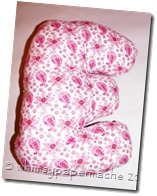
Alphabet pillow letters are a great way to personalize a kid's room or a baby's nursery by hanging them on the wall. These decorative letter pillows can be a great teaching tool when your child is first learning their name and provide visual stimulation. They have also been known to be a big hit in the girl's college dorm rooms as school initials.
Sign up for the Free Alphabet Pattern Give A Way
How 2 Make Alphabet Pillows
There are several alphabet letter pillow patterns made by the leading pattern makers such as Simplicity and McCall's. Both brands have similar patterns so it really doesn't matter which one your purchase. Although some letter patterns also have heart and square shaped pillow patterns included, so you feel like you're getting more for your money.
You can design letter-shaped pillows by choosing a big fluffy font, printing that out and using that as your pattern to create your pillows. Gill Sans Ultra Bold looks good in my fonts for creating these letters. You can enlarge them to any size you like.
Choose any fabric that fits your personality there are hundreds of choices to choose from; it can be a overwhelming decision. I use cotton in the video how to but I have used many other fabric materials such as soft velvet, shiny metallic, and fleece.
Use decorative fabric prints or bright, solid colors and choose your thread based on the thickness color of fabric you use.
Supplies and tools needed for the whimsical letter pillows in our tutorial video.
Fabric
Needle & thread
Paper scissors & Fabric scissors
Polyester fiberfill
To begin sewing the pillows, some preparation is necessary.
Iron the fabric before cutting it so that it is easier to work with and wrinkles do not create puckering around the seams. If needed iron your pattern after cutting it out, but only on low heat.
Easy Steps for Letter Pillows
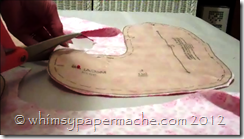
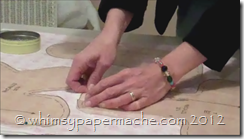 1. Lay your fabric down on a working surface and line up the edges of the fabric. The printed side of the fabric will be facing each other; you will be cutting two for each letter at the same time. Pin all your letters to your fabric matching the notches.
2. Cut each letter out of your fabric. Sew or stitch your letters together leaving an opening between notches, for inserting the stuffing.
3. Carefully Clip the fabric around the edge of the letter before turning it right side out for smooth curves when stuffing. This is very important for the overall look of your pillow.
4. Turn your pillow right side out and stuff with fluff. Mold and shape your pillow for a perfect letter, breaking up the lumps and thick spots. I used one and 1/3 fiberfill bags on my eight letters.
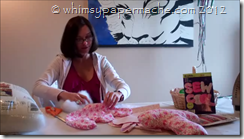 5. Making sure stitches show as little as possible hand sew the opening closed with matching thread.
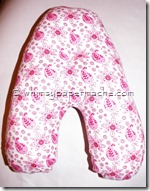
If you are making the alphabet letter A you will make a cross stitch through the thickness of the letter and pull the stitches tightly together for the indent effect.
That's it! Your cool letter pillows are ready for hanging or wrapping. They are so cute.
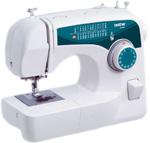
If you don't have a sewing machine don't let that stop you, use fleece, embroidery floss, embroidery needle and hand stitch your pillows.
1. Join our Face Book Page WhimsyArtist, you can do so from the right side menu or follow the link.
© wHimSypAperMacHe.com 2012

