Snowman Painting and Finishing Artsy Touches
In this article you will find step by step instructions to creating the perfect snowman for this Christmas Season. You will not need any previous experience in paper Mache clay, you will need a free spirit and “I can do it attitude”.
Green Art
To begin painting your snowman you must first read and watch the tutorial: An Easy Paper Mache Clay Snowman. In this video you will learn how to build your snowman for his finishing touches. Once you have your snow you will be ready to continue on to DIY Snowman Art: Tutorial 1 and 2 .
Start Art Here
First watch the You tube video that provided walking you slowly through priming your snowman art with a primer coat, painting his face, adding arms, adding glaze, and finally adding a ribbon.
Use small segments out of your day to complete your snowman, 30 minutes or so and then set aside your snowman to dry before moving onto the next step.
Snowman Art Step by Step
1. Sand your snowman. I use medium 60 grade sandpaper to sand my snowman.
2. Paint 1 layer of primer coat over your entire snowman with a acrylic paint brush and let this dry completely. Read the instructions on the can for dry time. The Flat latex that I use in the video takes about 1 hour to dry.
3. Paint 1 layer of Acrylic white paint all over the snowman and set aside and let this dry completely, approximately 2 hours. Guys set it in the window on a sunny day and it dries faster.
4. Paint the face; eyes, carrot nose, and buttons in any acrylic color that you wish. Paint a scarf and gloves on your snow man or add a ribbon for a scarf. Then set aside and let this dry for an hour at least.
Tip: Do a Google search for snowman faces for additional ideals and to get your creative juices flowing.
5. Apply the glaze mixed with a small amount of grey to add warmth. You will apply the glaze with a synthetic Paint brush. Apply to a small area and then wipe off. This will bring out the natural indentions in your clay snowman. You will do this all over your snowman and then give it plenty of time to dry.
6. You will now attach arms to your snowman by drilling a small hole in both sides and placing wire (sticks) in the wholes. Glue the wire into the holes using a strong epoxy, like cement glue. Sign you Snowman Art work and date it if you wish. Once again set it aside and let it dry.
Tip: You can paint gloves on your snowman. Also you can use a nail and hammer to make a small hole into your snowman art for arms.
7. Now, you are going to apply your finishing coat of polycrylic stain glaze all over the bottom of snowman and let this have several hours to dry. Now apply the polycrylic over the snowman sitting on the finished bottom. Let this dry completely for hours.
Great Job
Congratulations, give yourself a hand for completing your Paper Mache Artsy Snowman. I almost forgot, your last step is to upload your snowman photos to our Facebook page so we can enjoy your Snowman with YOU.
Materials for Snowman Art
Snowman Art Craft Supplies
Polycrylic Stain Glaze
Gesso or Flat Latex Paint
Small Paint brush for detail or Paint Pen
2 inch synthetic Paint brush for glazing
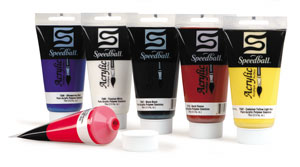
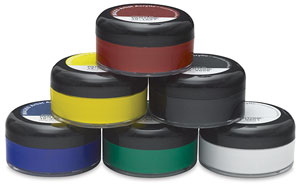
Acrylic Colors for face and accessories
Thanks
Charisse
Want More
Facebook Page: http://www.facebook.com/WhimsyArtist
Follow On Twitter: http://twitter.com/whimsymachegirl
Follow On Twitter: http://twitter.com/whimsymachegirl
You Tube: http://youtube.com/user/whimsymachegirl


